I switched my bikepacking setup this summer and with two longer trips using it, I thought it was time to describe what I take and how I pack. I last did that in the Different East Coast Greenway post and much of it is the same, but the rear end is quite different. Since this is a gear post, I will mention the stuff that I have and why I got it, but it’s not a review and I am not in any way sponsored by any brand mentioned. I paid for everything I have and frankly, I wouldn’t accept anything from a source because I don’t want to be beholden to anyone. Also, there are many ways to do all of this with stuff from a variety of manufacturers and I’m not saying mine is better than others, it’s just what I have settled on.
While I have not weighed every item separately, the bike fully loaded without water is 45 lbs. The bike (Raleigh Roker Comp with Shimano GRX drivetrain) itself is 18 lbs. The current gearing is a 1x system with a 36 chain ring an an 11×42 cassette. If I could find a 34 tooth 110BCD GRX compatible chain ring I’d switch to that.
Rack and Bag Systems
These are a brief description of the racks and bags I use.
New Rear Rack System
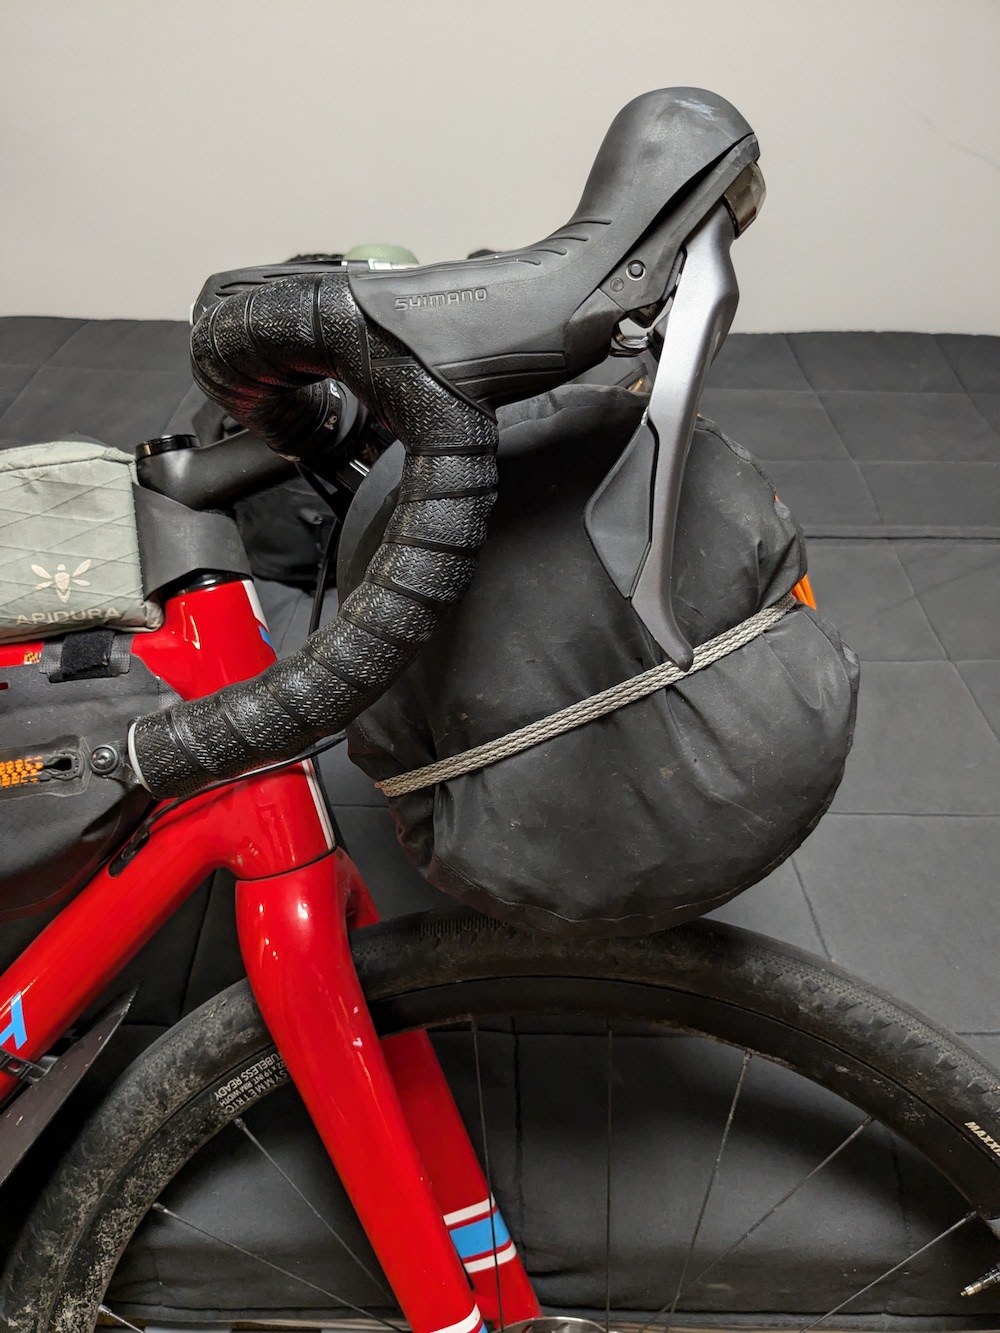
The problems I always had with the older underseat pack I’ve used for a number of years (16L Ortlieb) were twofold, one it was hard to pack and two it would get “droopy” or what Charles called poopy-butt. Underseat packs notoriously are not particularly stable with a lot of sway, but I fixed that by adding the seatpost two bottle carrier which stabilized it albeit causing some chafe in the bag. But the other two were a constant annoyance. Furthermore, when thinking about a cross country trip, I realized I needed just a little more volume than the 16L Ortlieb could carry. This pointed me towards a rear rack setup.
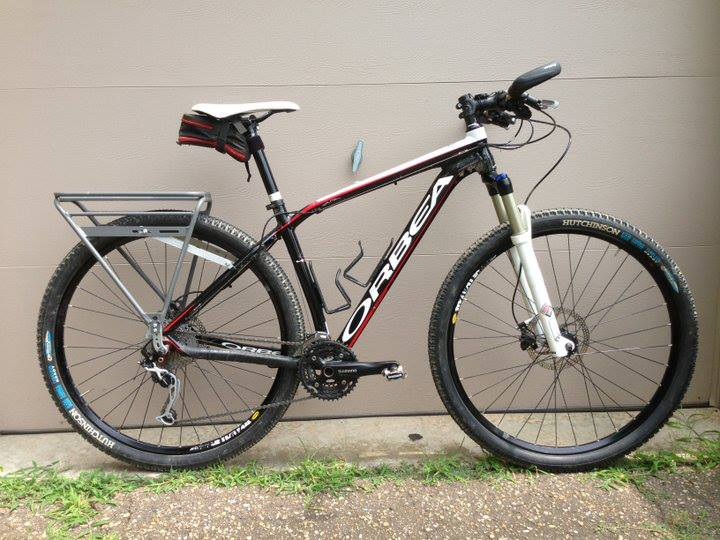
The problem generally with racks is how they mount and since I have a carbon frame, there is no mounting anything except a fender to the frame. Way back when, I had an old Man Mountain rack that mounted through a long quick release lever. This worked well on my old Orbea when I first started bikepacking but everything is different now.
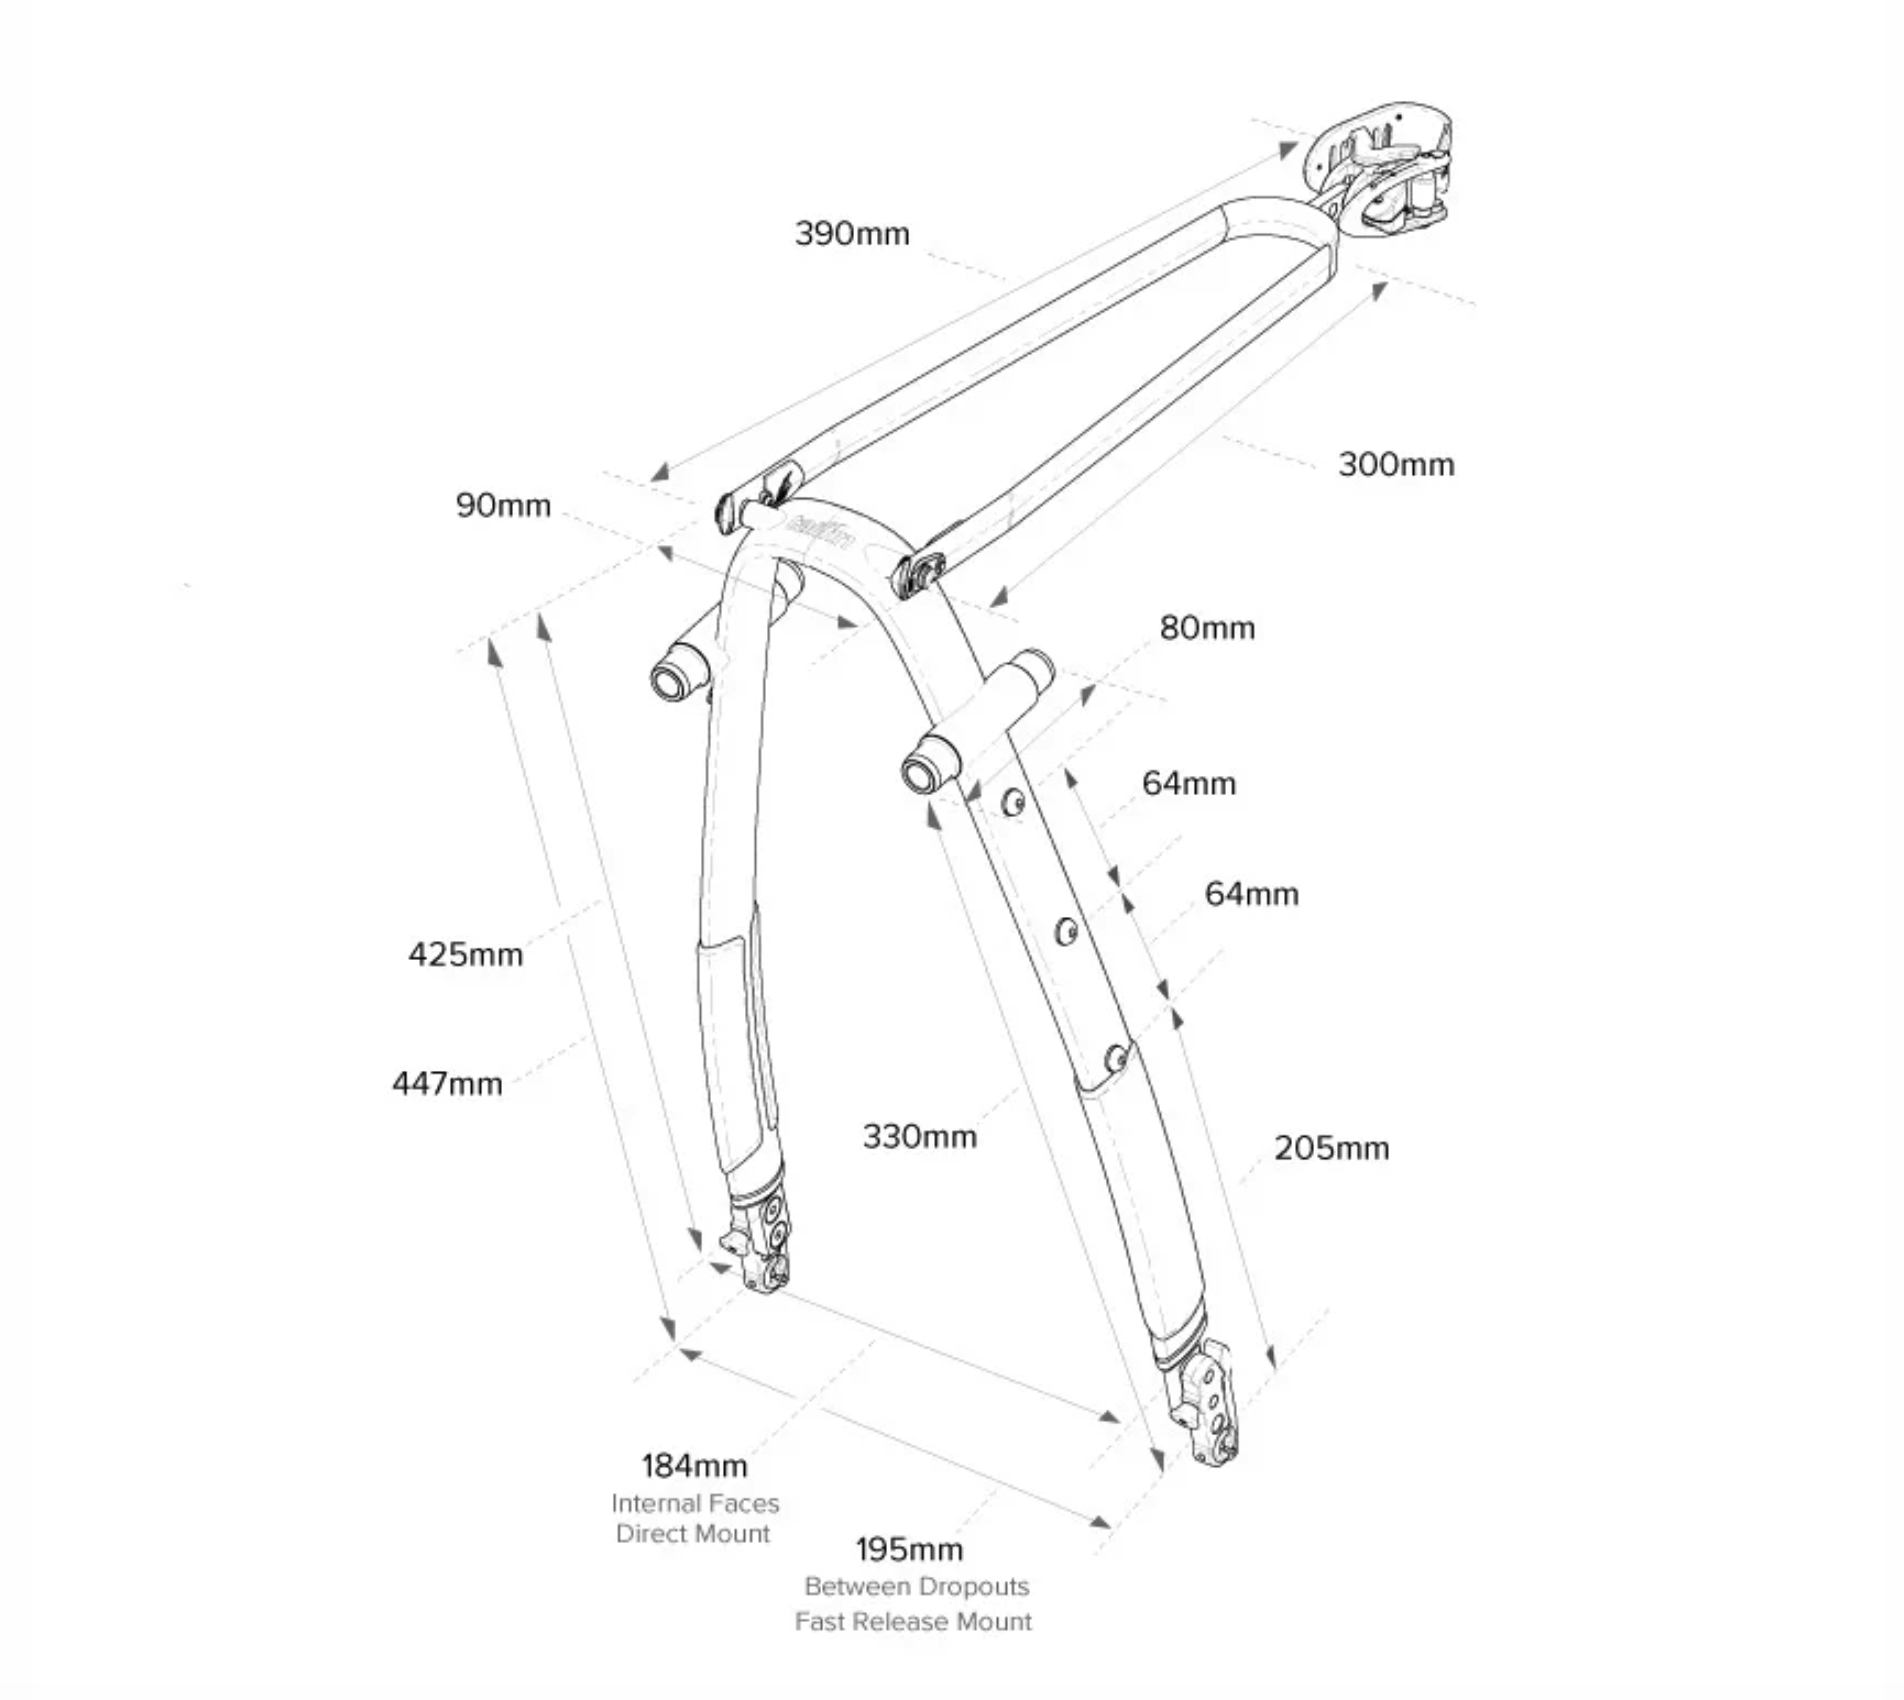
So I started looking around for other solutions and came across Tailfin which has rack/bag systems that seem well engineered, rugged, flexible and mount without touching the frame via a special through axle. Their website makes it very easy to determine what through axle you need to order. I got the alloy rack with pannier mounts. They make a carbon rack which is about half the weight but twice the price. If I were racing the tour divide, I might be more concerned about it (it was used very heavily in 2024), but I did’t want fussy. The basic dimensions are below and you can get all the specs on their website. I also got the extended seat arm so it can be used with a dropper post or if you are going to fill the trunk bag up (which I do) so it won’t interfere with the saddle.
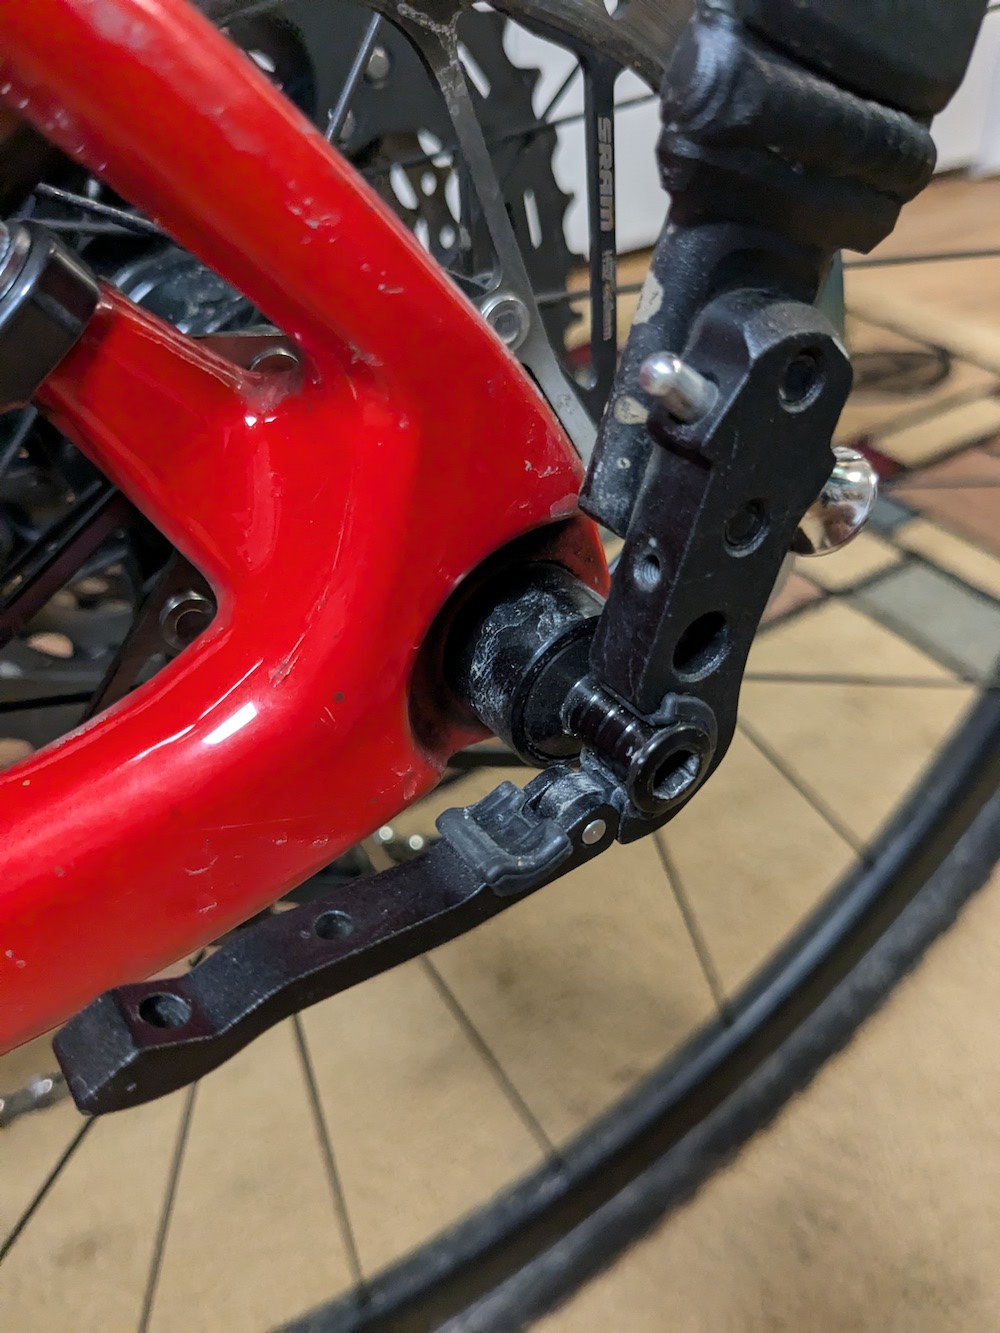
They make a variety of bags, but I got the 20L trunk (top) bag and two 10L pannier (side) bags. Here’s how it mounts on my bike. There are two quick releases that mount to the through axle and a strap for the seatpost.
The stuff is not cheap, but it’s extremely well made and light weight for its durability. The top bag and side bags are all “quick release” so easy to take on and off at camp and mount solidly even on really rough terrain, no doubt the reason the tour divide people like it. The only possible negative aspect is that if you have to take the rear wheel off, you have to remove the rack, but it’s really easy and does not require tools. I know, I had to do it three times on a ride up the NCR trail with Charles this summer when my tubeless tire plug failed and I had to insert (and patch twice) a tube.
So far it’s performed at least as well as my underseat pack but with more volume and much easier to pack/unpack. I have heard people complain that it causes “wobble” but I think that is a wrong characterization. A “wobble” is an unstable oscillation (ie it grows which is really bad). I have found that because the weight is all transferred into the through axle and there is a lot of weight on the handlebars, the bike actually flexes a bit laterally, and I think that is what people are reacting to and calling it a “wobble”. I’ve hit speeds of 40+ mph and it’s been very stable so I am not worried about it. When you get out of the saddle, you do have to be careful not to wave the bike side to side as it can exacerbate that lateral flex, but that’s not really any different from how you have to handle the bike with an underseat pack.
Handle Bar Cradle
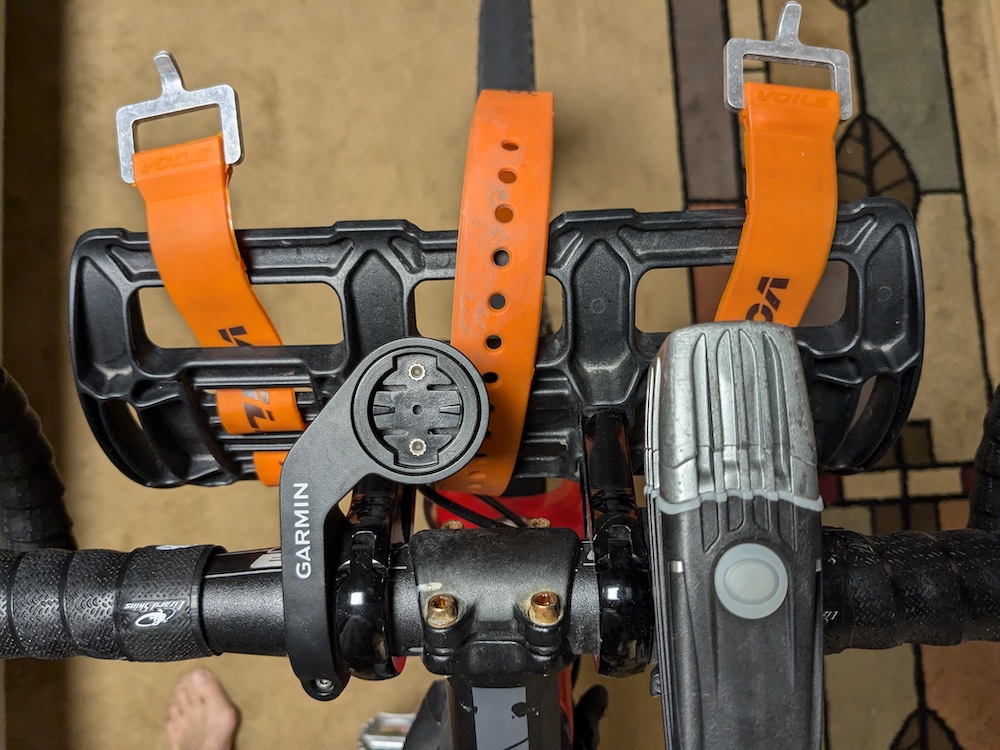
I’ve had the Salsa Anything Cradle for a few years now and it has worked great. It’s a little extra weight ( 1.5 lbs) but much better than having your bag bump around and hurt your bike. Also this is a no go with carbon bars, but you’d be a fool to tour with carbon bars. The one thing I did this year was cut down the length of the supports so the cradle would be much closer to the handle bar, but still protect the cables. I cut about 2cm off which took some doing as I had to retap some 5mm holes. I also replaced the supplied Salsa soft straps with voile straps, although Salsa sells it now with them.
Frame Bags
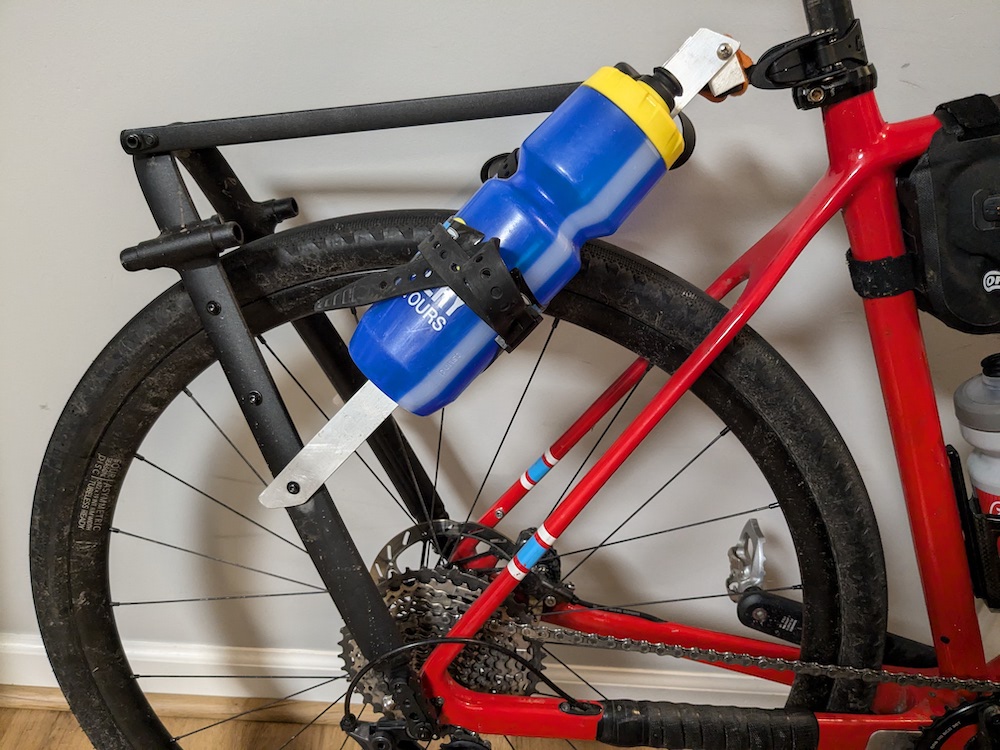
I’m using the same Ortlieb frame bag as I have for several years and it’s great. Sturdy and 100% waterproof, and still allows room for two water bottles (although I needed an extender to lower the rear one). The zipper pull broke during a trip two years ago and it was just outside the warranty period and when I asked them about it, they just sent me a new bag. That was great customer service! The top tube bag is an Apidura bag and I like it because it has a waterproof zipper, but the bag is just slightly too short on the back end and my Pixel 6a barely fits and is hard to get the zipper past it, which makes grabbing my camera (phone) quickly for a shot difficult. And if I don’t zip it for easy access, it can fall out over a bump, which has happened several times. I’m looking around for something similar but slightly larger.
Packing the Bags
This is the fun part. For context, this is everything I think I need for a trip of indefinite length in a temperate summer climate (40 degrees +), assuming resupply at least every 3 days. I do need to add a water filter as I can not currently do that. Obviously if you are in colder areas with bad weather, more will be needed, especially a sleeping bag that is not just a “quilt”.
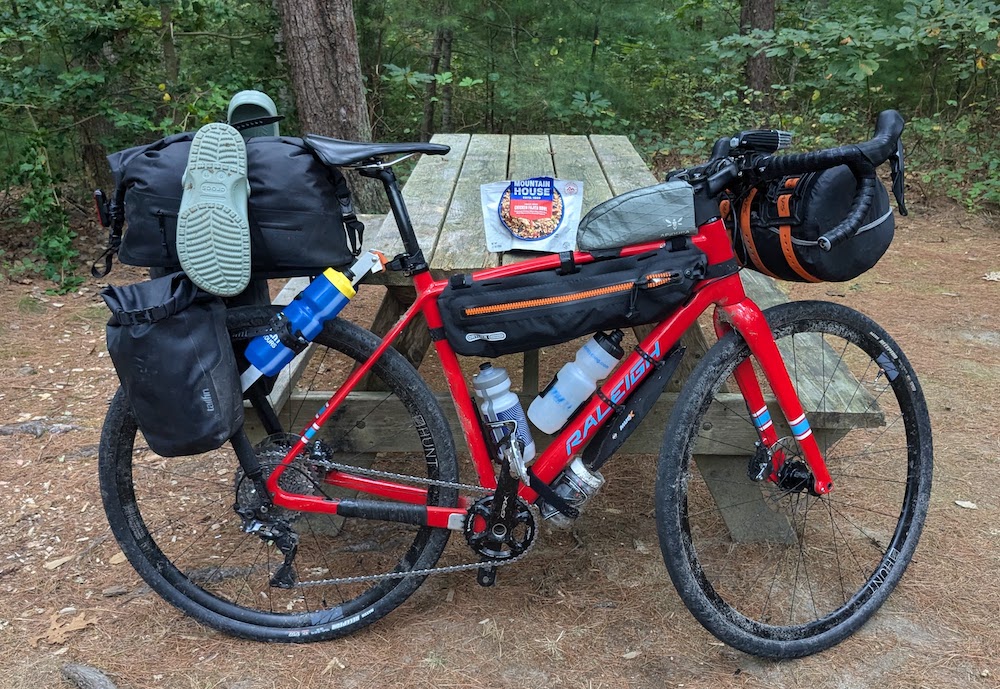
I’ve shown the fully packed bike in many shots, but here it is for a refresher.
Versus, the prior setup:
The rear weight is lower and the cooking stuff is not on the hanldebars anymore.
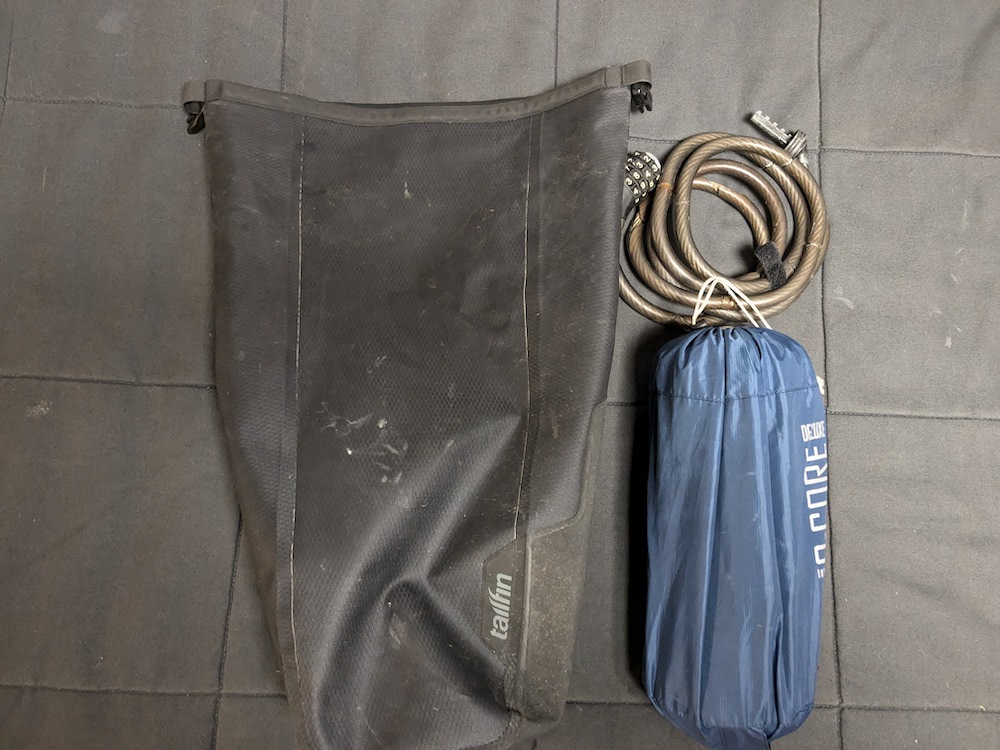
Trunk Bag
This bag has most of the things I will use every day, bike clothes, after bike clothes and personal items. It’s very easy to remove and carry from the bike and take into where I am staying (either the tent or someone’s house).
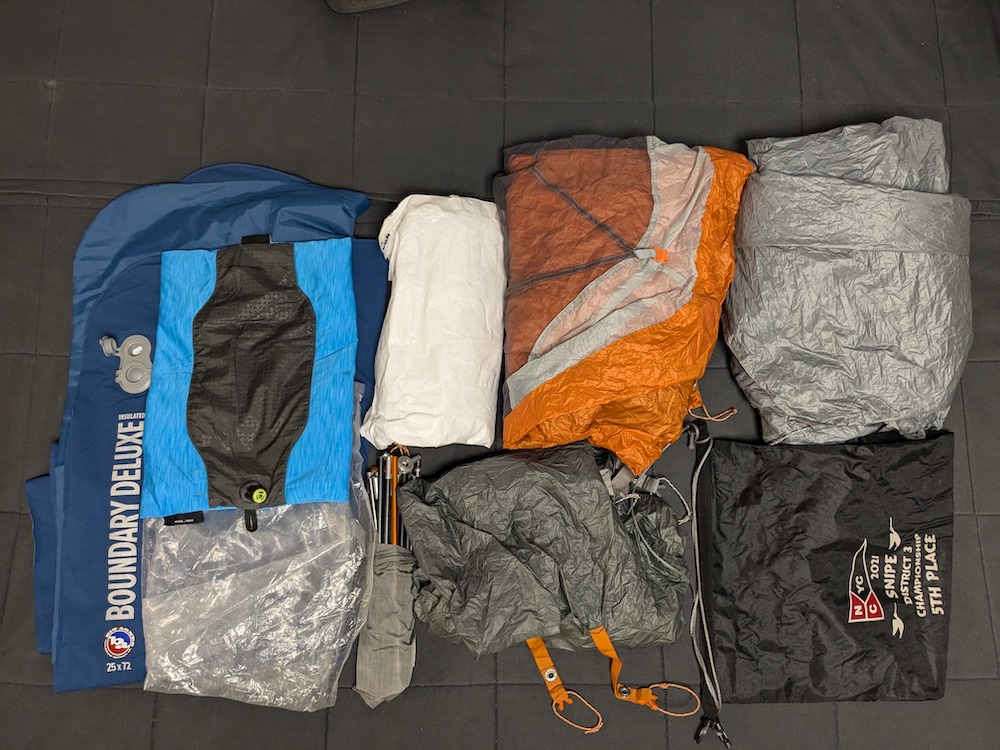
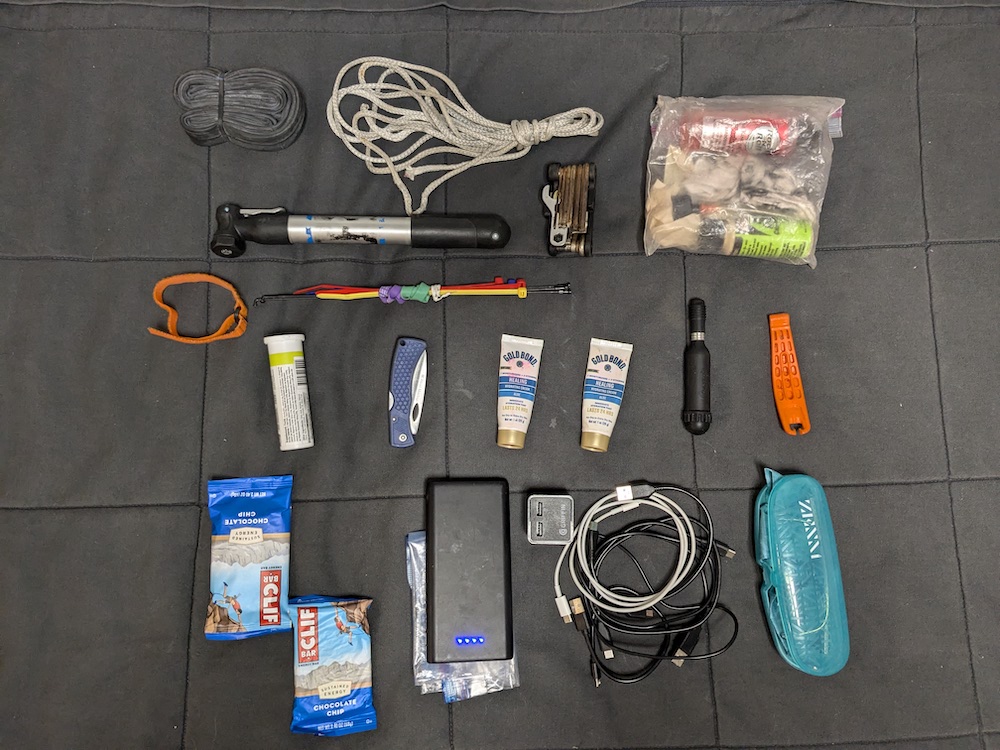
Here’s the detailed list of what I carry. Like backpackers, a good trick is to segment things into other bags so it keeps like things together and you don’t make a mess routing around looking for things. I use the washer bags that Pactimo supplies with their bibs for clothes and a light stuff sack (came with my pad) for the personal items. Everything in one picture:
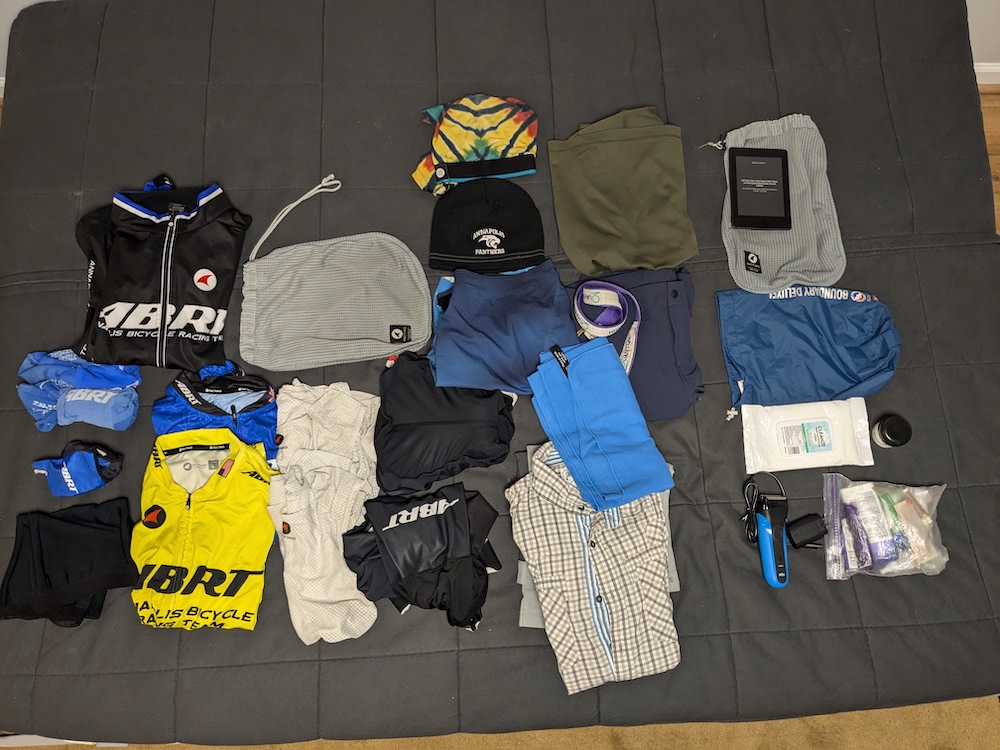
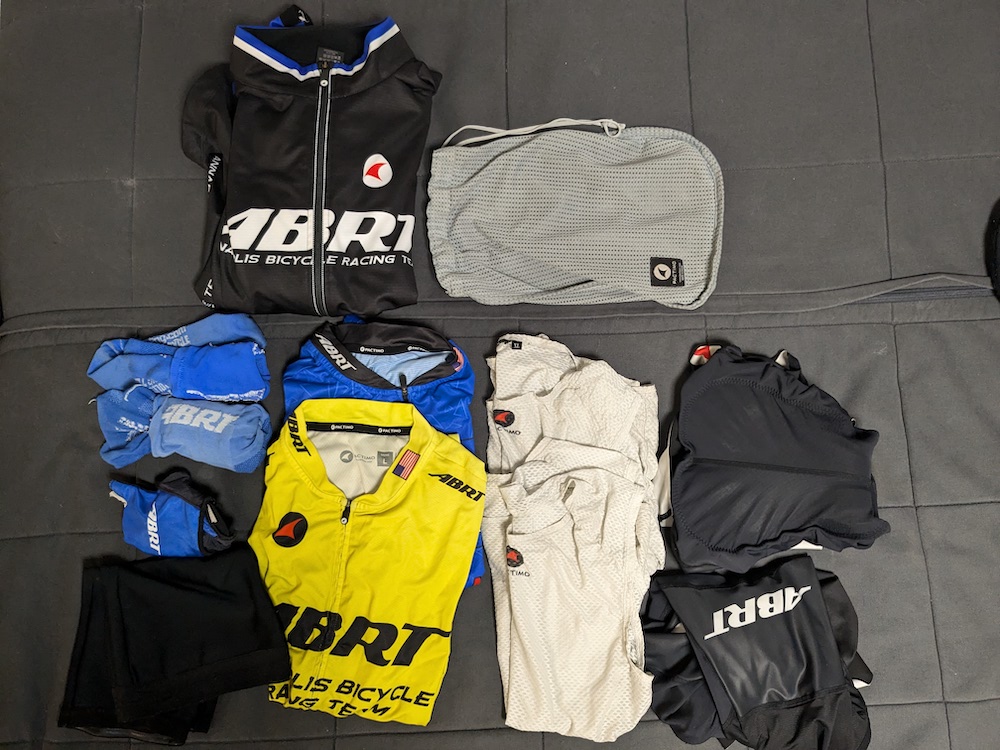
Bike Clothes: 2 complete kits w/baselayers, knee warmers and a heavy/waterproof jacket. Of course I am wearing one kit and my shoes (Shimano SPD with semi flexible soles and recessed cleats that are reasonable for walking short distances).
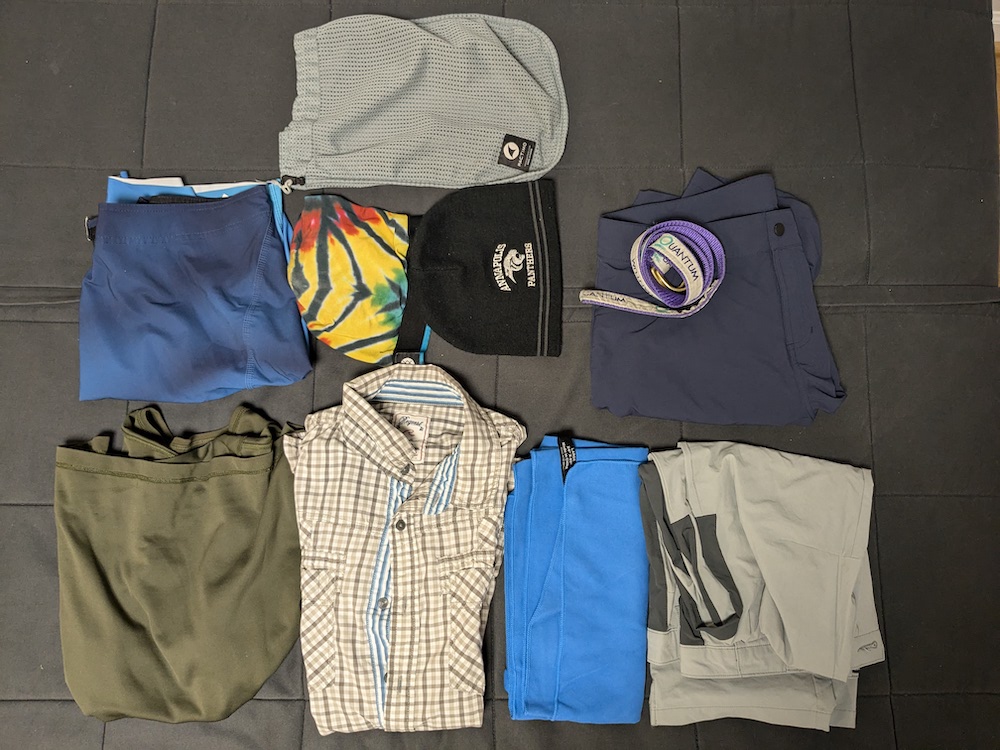
Off Bike Clothes (clockwise from top left): board shorts, underwear, hat, shorts/belt, lightweight long pants, camp towel, collared short sleeve shirt, and tech t-shirt. All of this stuff is “tech” gear so is very lightweight and dries fast. I find the long pants are important mostly for bug protection.
Personal Items: Braun shaver, Kindle, wet wipes, chamois cream, misc toiletries (folding toothbrush, tooth paste, deodorant, lip balm, bandaids, ibuprofen, liquid soap, Neosporin, cortisone cream). Everything except the Kindle goes in the Big Agnes bag. The electric shaver is a bit of an extravagance but I really like being clean shaven and keeps me from feeling disgusting even when I can’t shower. I can generally go 3-4 days without charging it. I copied Ryan Van Duzer on this one. The wet wipes and Neosporin are really important for proper main-taint-tenance. If you start getting a “spot” you gotta jump on it immediately. The Kindle is great because I end up needing to read a lot, it is backlit so you don’t need a reading light, can carry a lot of material, is lightweight and needs infrequent charging.

Here is everything packed in the individual bags:

And all packed in the trunk bag:
Typically if I am at camp and the weather is good, I set up the tent, open this bag and toss the individual bags into the tent and leave this on the bike. If it’s raining, I’ll put the bag in the tent vestibule and unload it from there. So far the bag seems 100% waterproof.
Side Bags
These are technically pannier bags, but I think of them more as dry bags strapped on to the side of the rack, attached with a quick release mechanism. They are 10L and more or less round in cross section. I keep my cooking stuff and food in one and sleeping bag and down jacket in the other, plus some random stuff.
Cook Kit: 600ml AL pot/lid/handle, two large mixed fuel canisters (good for >20 boils each), insulated cup, spoon/spork combo, MSR pocket rocket, and lighter. They all nest into the Q-core bag. I like carrying two fuel canisters so I don’t stress about it. You can get them at Dicks if needed.
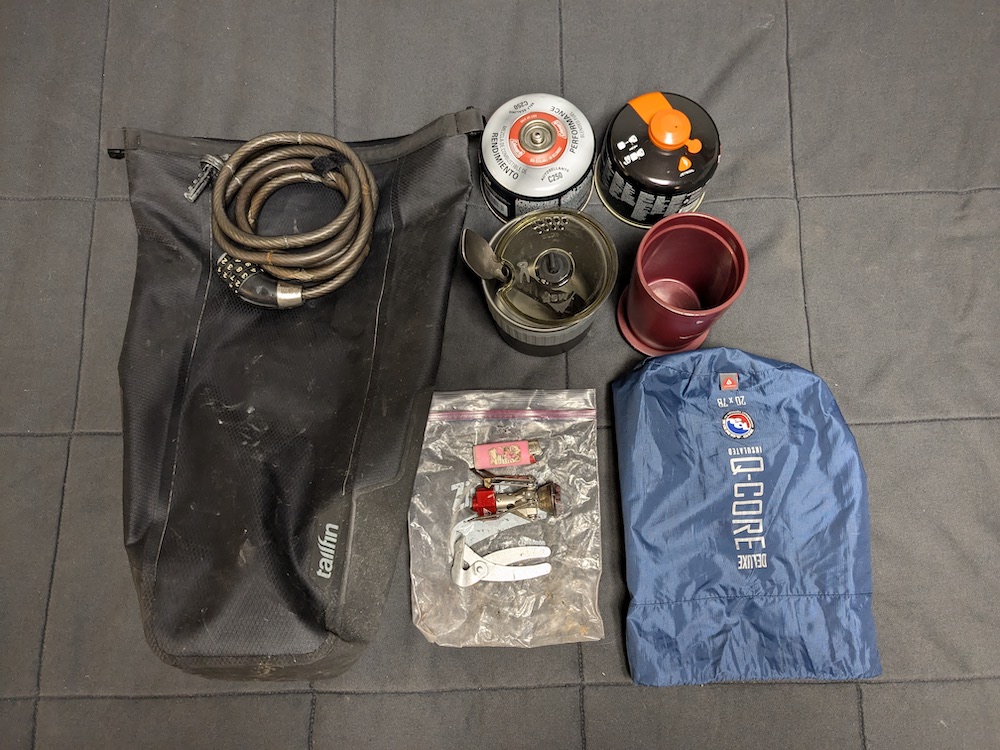
The stove/lighter/handle nest into the plastic mug which goes into the pot with a canister on either end and into the bag. I toss my lock on top of it and maybe some food stuff to pad it out.
The other side has my sleeping quilt, down jacket and bikepacker meals, plus instant coffee (Starbucks, it’s pretty good) and I usually have some instant oatmeal packs and Bran Buds for my morning concoction. I try and balance the loads equally side to side.

Handlebar Bag
The handlebar bag is just a 20(?)L run of the mill dry bag that I got as a trophy at a regatta. This contains all of my tent gear: Inflatable pillow, Big Agnes 4″ thick pad, Big Agnes Copper Spur 1 person tent (side entry and the bikepacking version with 10″ pole sections) including fly and footprint. I also created a tyvek footprint with a lip to help keep running water under the tent in large thunderstorms from causing wetness. Seems to work well and there is not much of a weight penalty. I fold the pad in 3rds and roll it up with the pillow and put it in the plastic bag to keep it from any wetness in the tent stuff (not uncommon and can be very wet if you packup in the rain). I put the rolled pad bag in, roll the tent poles/stake in the tyvek and place them in the bag. I then stuff the fly, tent and footprint in the bag and seal it up. Counterintuitively, it’s better to crunch and stuff the tent rather than fold and roll it. Just don’t leave it that way too long. I always unload it when I get home, air it out and hang it up.
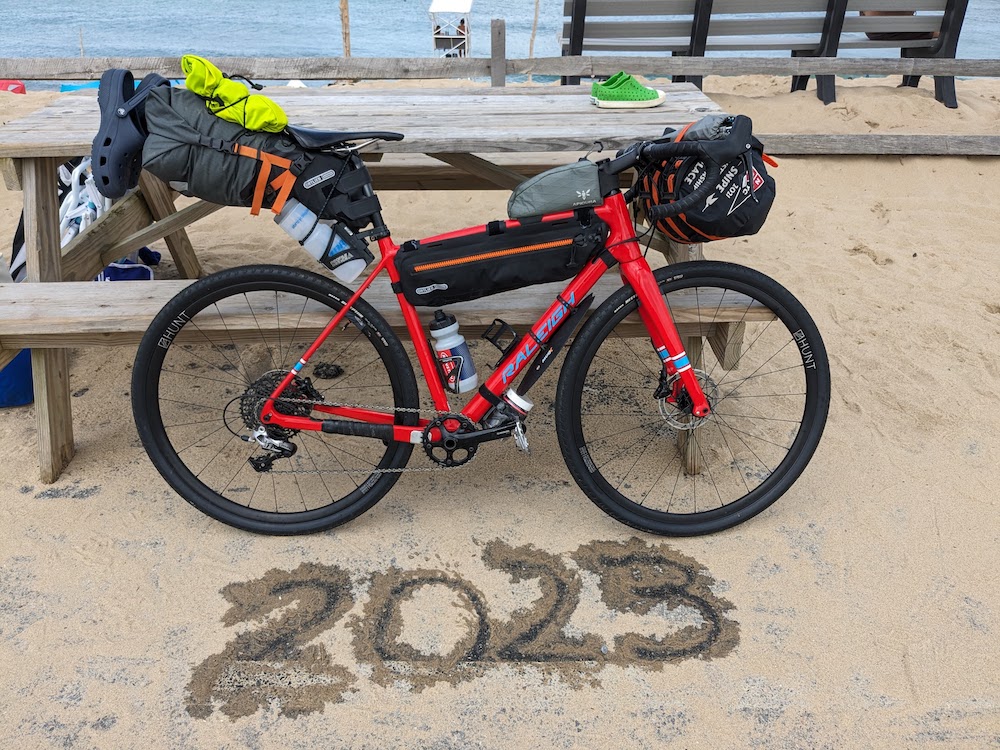
Fully packed on the handlebars and strapped down:
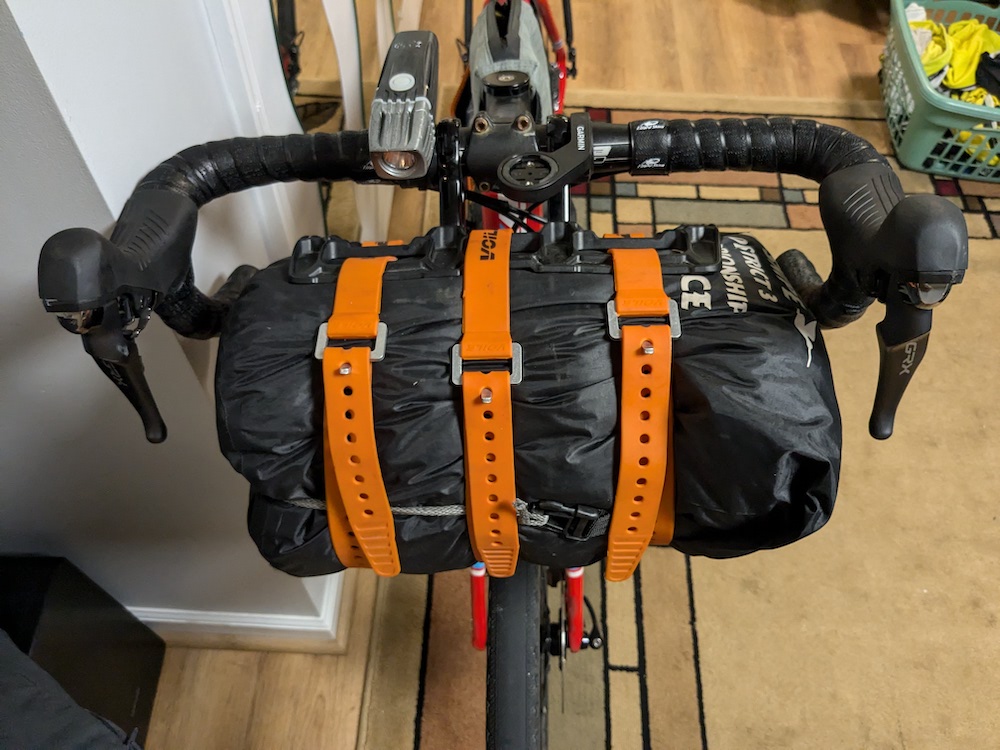
A side view:
Frame Packs
Frame bag contents: This is stuff I might need quickly or that is heavy since the weight is centered: tube, spectra clothesline, multitool, pump, lube/rag/sealant, spokes/zip ties, Hammer Fizz, rigging knife, sunsreeen and deet bug lotion, tubeless plugger, tire iron, cliff bars, battery brick, assorted cables/110 plug and glasses.
The battery brick can charge my phone for 2-3 days, has a USB-C power delivery port for quick charging of the brick and my phone. I’m trying to switch all my stuff to USB-C. My Garmin 840 solar has a USB-C port, but I only have to charge it every few days because of the great battery life and solar boost. It works great for navigation, but that’s a post in and of itself.
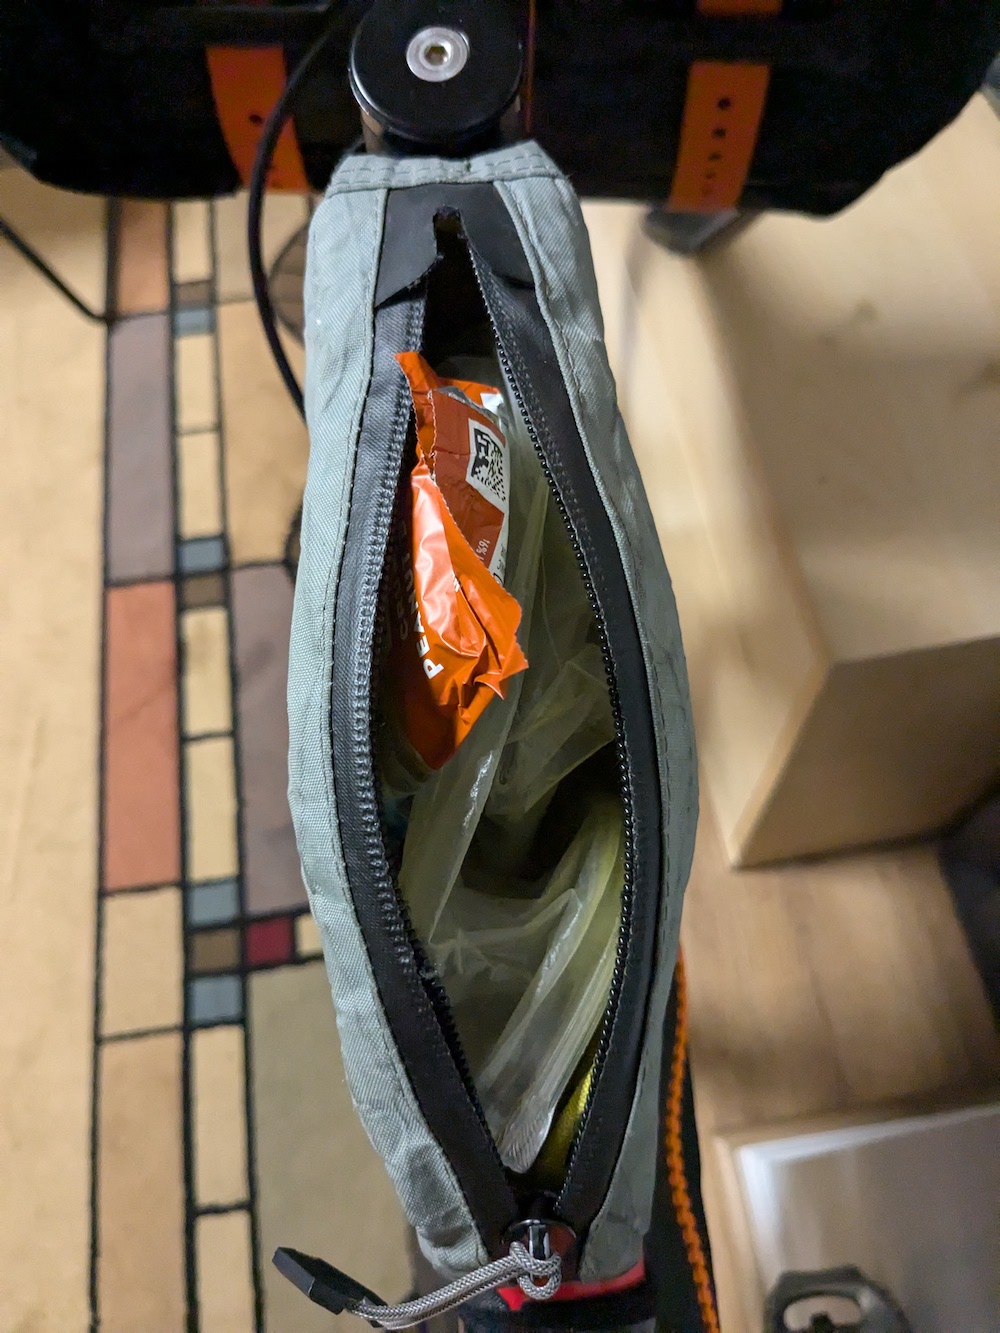
Top Tube Contents: Phone, bag of cash/change (and can put the phone in if really wet) and a cliff bar.
MacGyver Pack
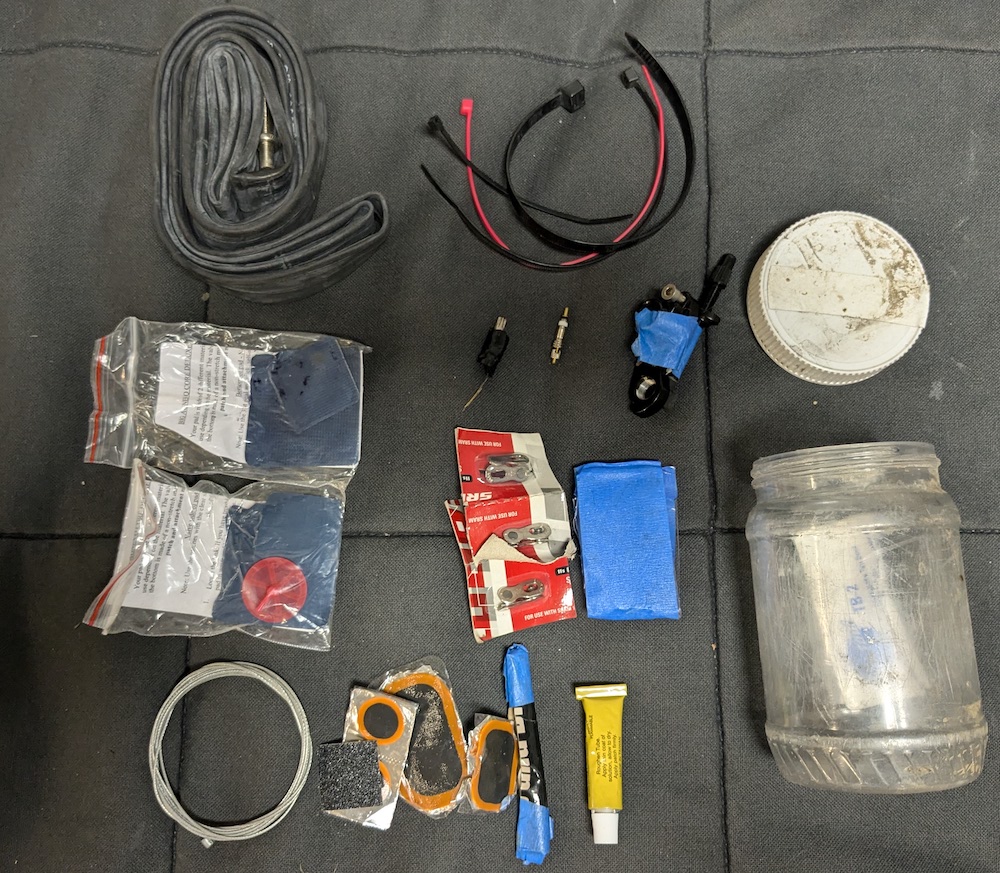
You notice a small (plastic peanut butter) canister under the downtube above? In that is my set of spare stuff might need for very off nominal contingencies, ie the “MacGyver fixes”. Another tube (in case of complete tubeless failure), more zip ties, patches for my sleeping pad, a torx bit, a tubeless valve core, a tubeless valve stem, a derailleur hanger, quick links, extra tubeless plugs (in the blue tape), tube patches and glue, shift cable, Park tire boot (in the jar) and whipping needle/waxed thread in case you get a tire sidewall cut you need to sew together. If it were a longer trip I would add several sets of brake pads. There are not many more contingencies I can think of…